

How To Make Cutouts In Photoshop
The best 3 ways to cut out annihilation in Photoshop CC (2 for all versions)
Learn how to cut out photos and objects in Photoshop. 1 of the mot popular tasks in Photoshop is cutting out things, AKA remove the background. In this tutorial nosotros volition look at quick Select, Refine Border and the Pen tool. Your choice will depend on the image, see the difference and so choose the best pick for your task.
3 Ways to cut out Photoshop in Photoshop CC (2 work in any version)
The three methods I'chiliad showing here are Quick select and Select and mask, which is great for things like hair and fur. And so I'll show Color range which is awesome for things like trees. Finally, Ill give you a crash course on the pen tool and why y'all should use information technology. You're thinking, "I don't have all day" All this happens in fifteen mins. If you lot utilise Photoshop this is fourth dimension well invested.
Which is your favoriate method? Let me know in the comments.
The photos used in this tutorial come courtesy of Adobe Stock.,
► Become an Adobe Stock Contributor:
► x complimentary images from Adobe Stock
Links to images used (Download the watermarked versions for costless)
- Woman with reddish hair
- The Tree
- The car
Method one: Cut out Hair in Photoshop
For the first method, (Which works on Photoshop CC only) we will start with this image Woman with red hair.
She has curly hair, so information technology will be a chip tougher than straight hair. This technique likewise works on fur.

Pace 1. The pick.
Grab the quick select tool from the toolbox.
![]()
Rather than select our discipline, we will select the background considering it's simpler. (If information technology was a complex background, select our subject instead. Here is a tut for cutting out against busy backgrounds)
Drag your quick select tool over the area to select information technology. If yous get likewise far, Alt/Option, drag to deselect areas.

Step 2.
When everything is selected, nosotros need to inverse the selection and so that our subject field is selected. Cull Select>Changed or Cmd/Ctrl+Shift+I.

Step 3. Refining the option.
Click on Select and Mask from the meridian toolbar, this will have you into the Select/Mask workspace.
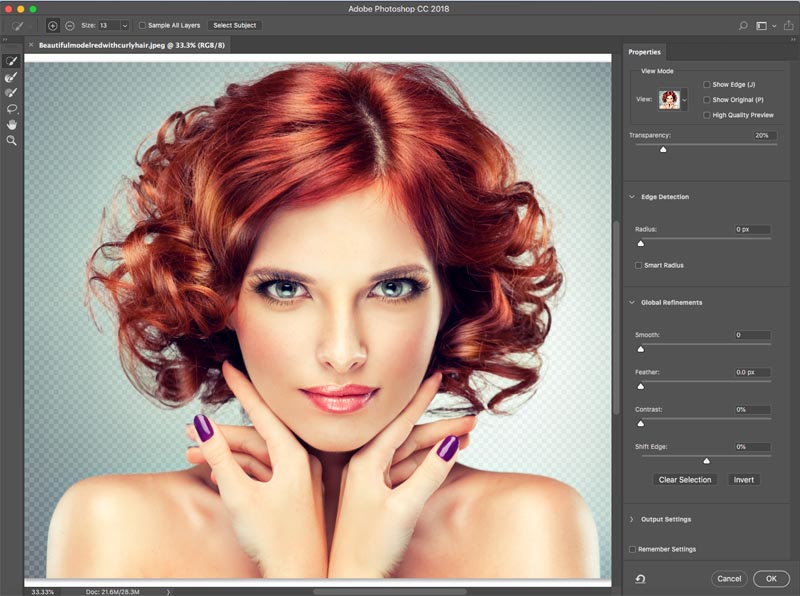
Increase the Transparency so that you make the background invisible. (This is just for preview purposes).
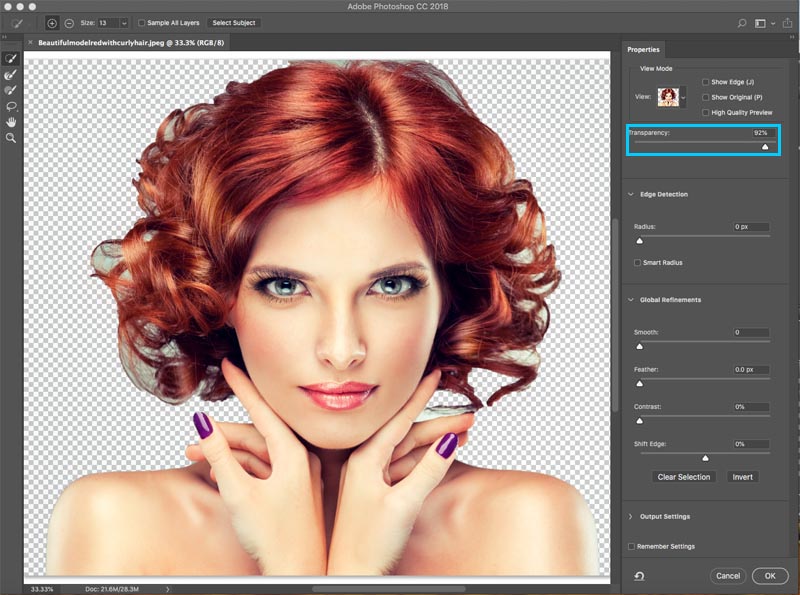
Modify the view to black or white, whichever shows the edge the best.

Grab the refine brush for the left toolbar. ![]()
Paint over the areas of the flyaway pilus. Make sure you become all the ends of the pilus and don't become too far into the epitome, yous just want to get the edges, then you tin tell Photoshop what is hair and what is the background.

Yous will detect every bit you refine, the entire selection gets smarter and the selection will get better.
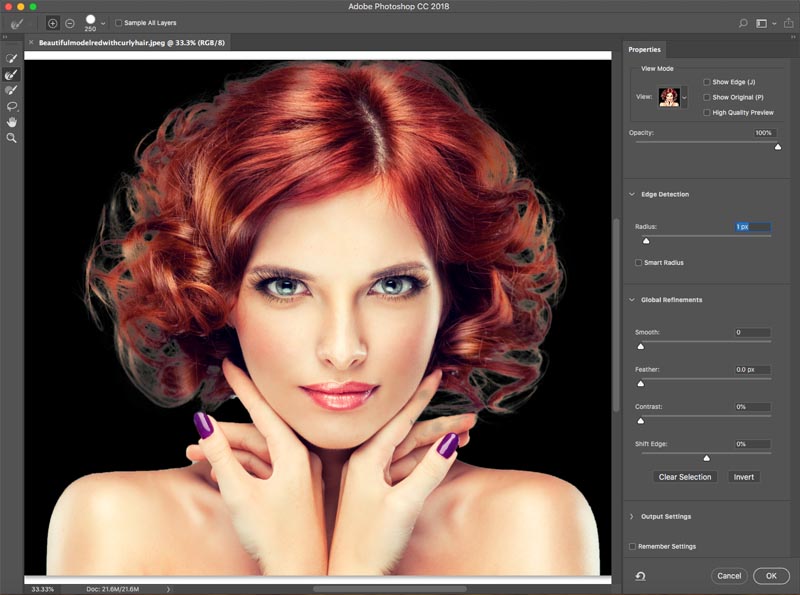
Here is a secret weapon in Select and Mask when it comes to hair. Turn on Decontaminate colors. Immediately, the color fringing disappears.
Change output to: New Layer with Layer Mask, Click ok.

Issue, cut out hair.
And now nosotros have a prissy cutout. You will meet a layer mask on the layer that you can employ to further refine the cutout if yous need information technology.

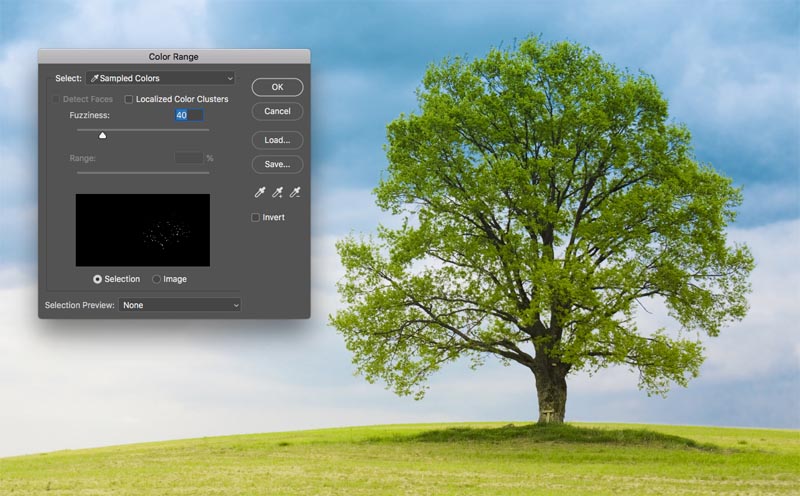
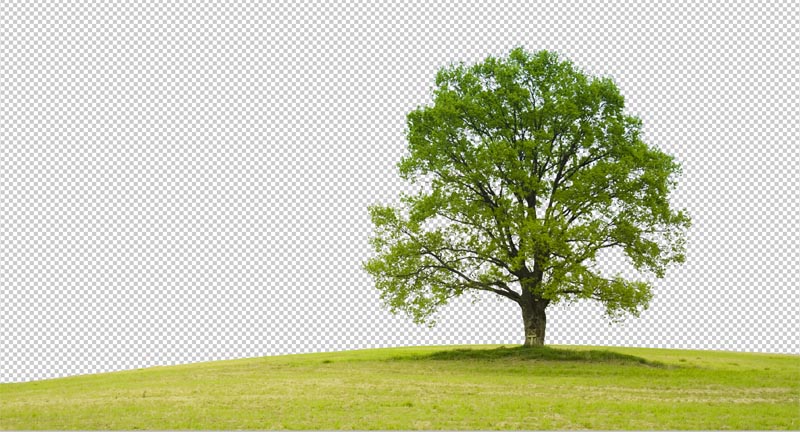
Method 2: Cut out Trees with Color Range (Works on all versions of Photoshop).
In this tutorial, we volition cut out The Tree using colour Range. This tool is also slap-up for cut out transparency, like glass smoke and liquid (run across tutorial).
This is the best method when nosotros need selections and the subject is complex with lots of holes, merely a uniform color behind information technology.

Step one. Using Color Range to brand a selection in Photoshop
Choose Select>Colour Range.

The dialog box pops up.
Step 2
Choose the left Eyedropper tool.
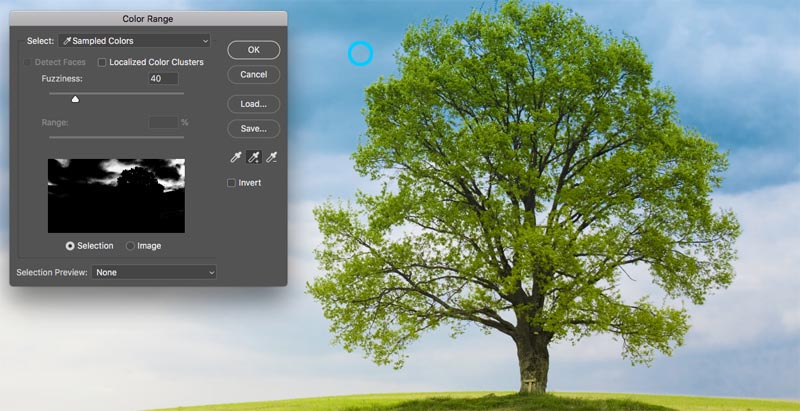
Click on the groundwork, choose the most common color and shut to the subject. I clicked on the sky bluish. Observe the Window in Color Range shows some bits of white. Those are the selected areas.
Stride 3. Refining the choice
Click The eyedropper that has a + next to it.
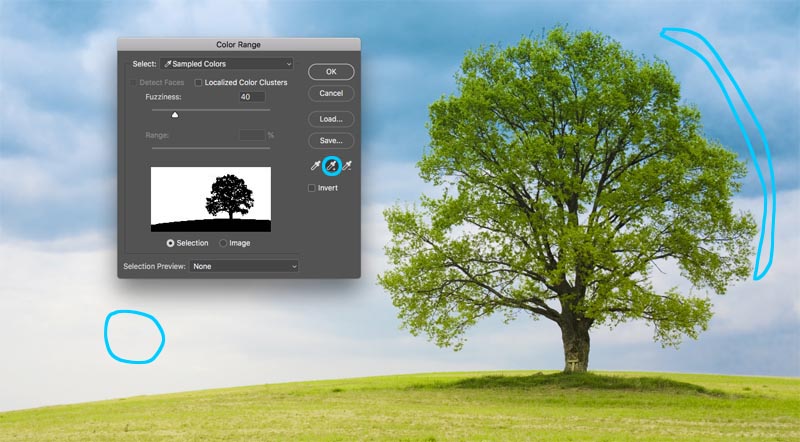
Drag this across the groundwork to add to the selection. Here I dragged to the right of the tree to pick up all the dejection and whites.
I was missing a tiny bit, and so I clicked again in the white area. Look at the preview window. Notice is a nice blackness and white, This is the goal, to get shut to this.
Footstep iv.
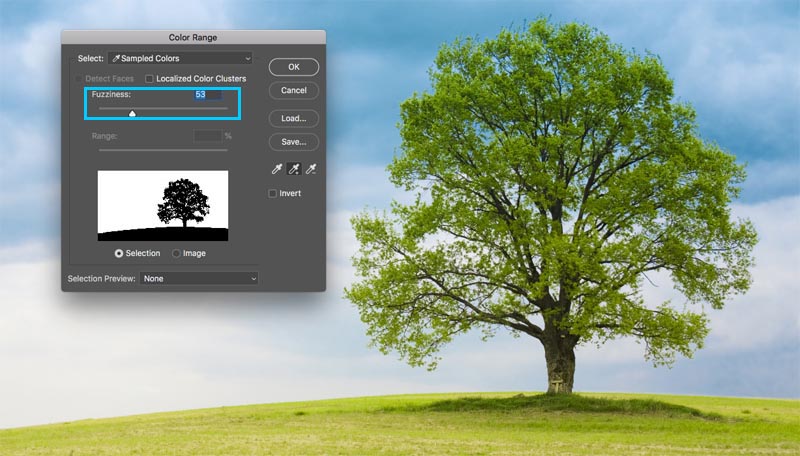
Slide the fuzziness slider to refine the selection and get our field of study nice and black and the background white.
Click ok.
Detect the marching ants section. We have successfully selected the background.

Step five. Masking the option
Let's cut this selection out: Considering the background is selected, we want to invert the area that is cut out. (Show the subject and hide the background). Because of this we volition hold down the Alt/Selection primal and click the new Layer mask. (If the subject area is selected, then don't hold down Alt/Selection). Click the Layer Mask icon.
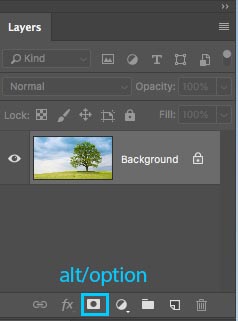
You lot will see a layer mask has been created, (More on Layer masks here).
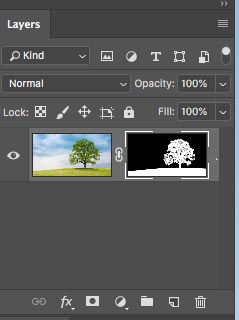
And here is our nice, clean cutout.
Method 3. Using the Pen tool in Photoshop to cut out hard edged selections
When it comes to make clean edges, nothing beats the pen tool. This makes it the all-time option for simpler shapes that demand a crisp edge. It's one of the hardest tools in Photoshop to master, simply once you get it down, it volition exist so useful to you. I accept created an in-depth tutorial on the pen tool that will have you from total beginner, to a decent understanding of the capabilities of this powerful tool. Make certain to finish this tutorial and watch the video to a higher place get-go.
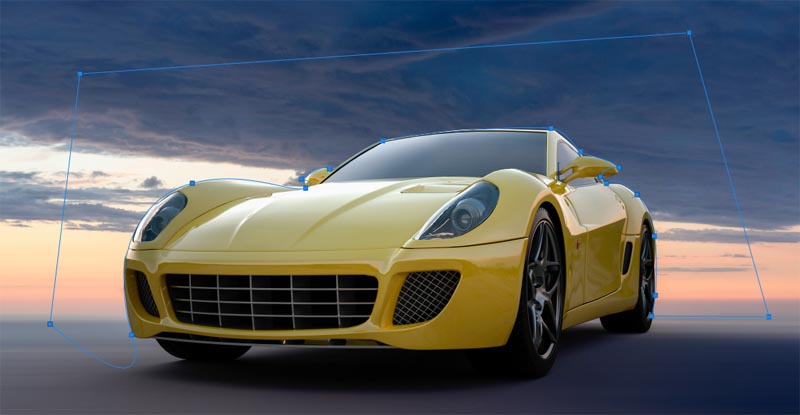
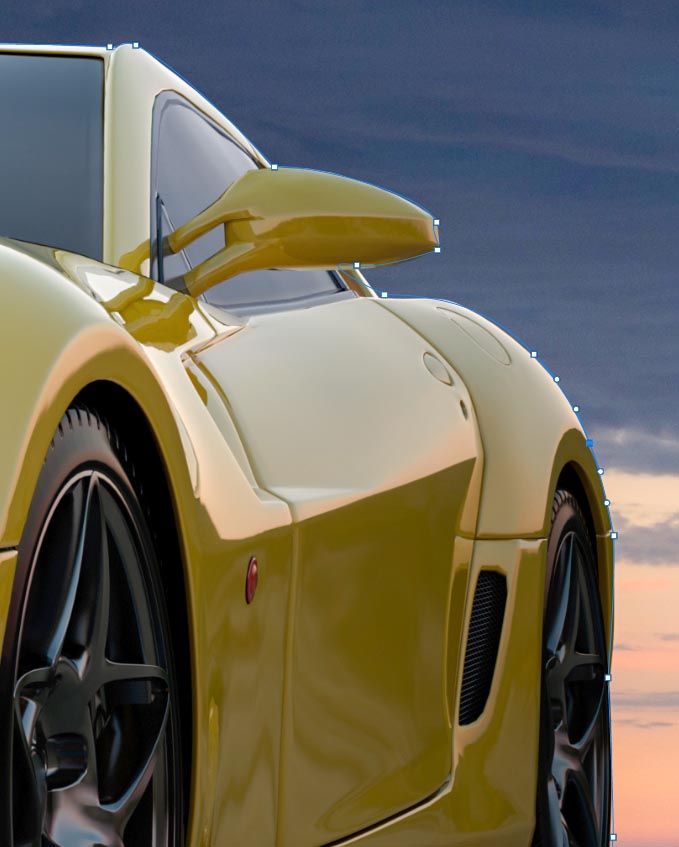
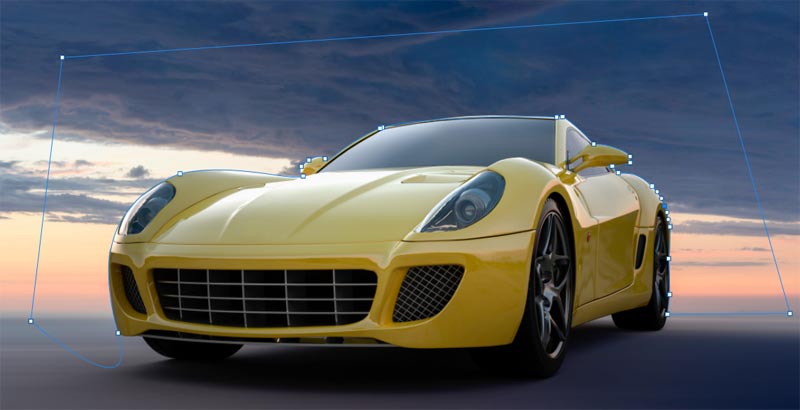
Here is the paradigm of The machine that I used from Adobe Stock. Allow'due south cutting it out.

Step 1. Making a rough edge with the pen tool
I accept my own fashion of using the pen tool, that I think works pretty quickly, I'll introduce y'all to it hither.
Choose the pen tool from the toolbar. Make sure the options at the top say path and not shape.
![]()
Click on the corner where you want to begin and elevate in the direction that yous want o brand your path
Cull the get-go curve in your object then click and drag again. This time you volition see an rubberband line betwixt the 2 points. Notice how it changes when y'all elevate close or further away from the point, or what happens when you alter direction. Don't worry about perfection at this indicate, all nosotros want to do is brand a path that roughly follows the outline of the shape.
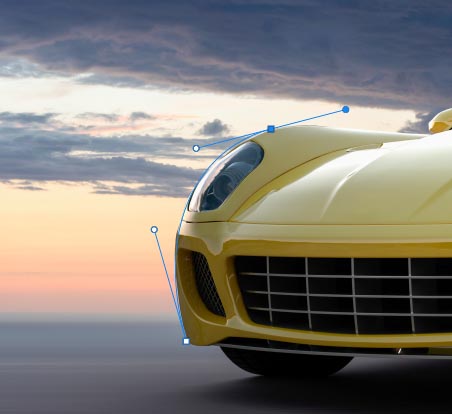
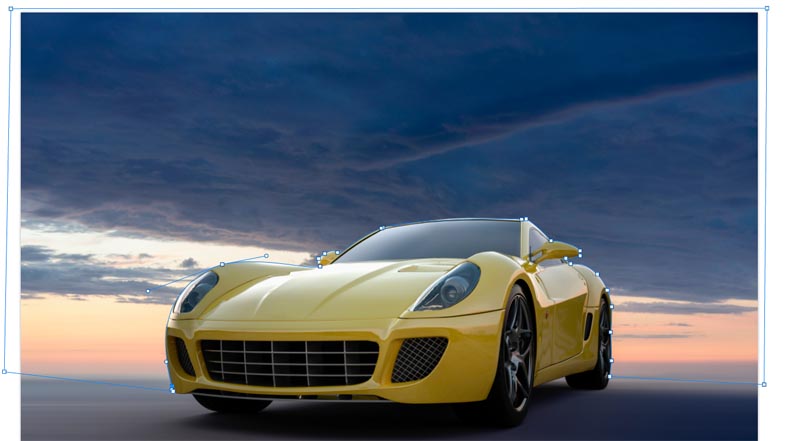
Observe when I got to the right wheel, I made a few points around the car, I am keeping the ground, and so I don't need to select the bottom of the car.
To finish drawing your path, move the cursor over the very first betoken. As y'all hover, you will encounter a little circle. Click on that betoken to close the path and finish cartoon.
Tip: The goal is to outline the subject with the to the lowest degree amount of points possible.
Step 2. Refining the path
Some people strive to go their paths perfect the kickoff time around, and that'due south ok too. Personally I like to break information technology into two phases.
Under the Path Selection tool, choose the Direct Selection tool.
![]()
Yous tin at present click on a point to activate it.
Zoom in squeamish and shut and carefully elevate the points into position. Click the ends of the handles to change the angle of the curves. Push button and pull these end points to modify the steepness of the curve. It may seem weird at offset, but it will get easier with a lilliputian practice, hang in at that place!
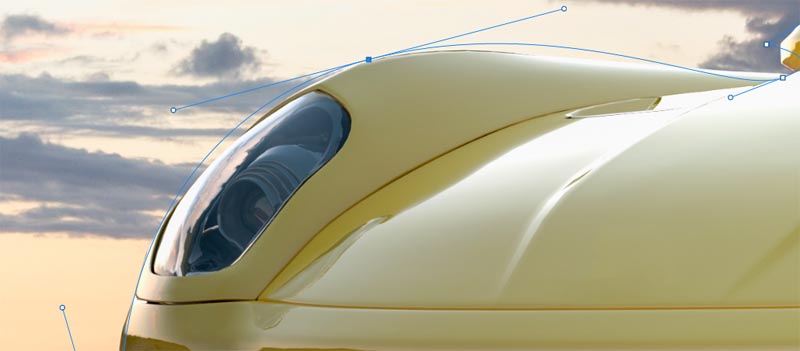
Tip: To move just ane side of the curve, hold down Alt/Pick equally yous drag on an endpoint.
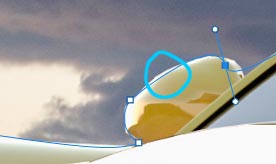
Footstep 3. Calculation points to the curve
When yous drag a bespeak into tight areas with lots of curves, information technology volition be tricky at starting time.
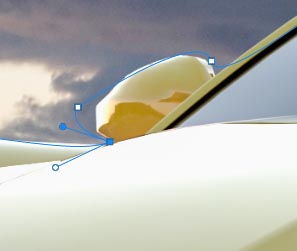
Hither we have dragged the indicate into the mirror, merely we aren't getting the correct bend on the elevation.
Choose the pen tool with the + on information technology to add a point.
![]()
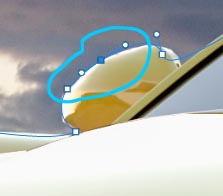
Click and release on the line, where you want to add another anchor point. You will now come across a new point.
You can go dorsum to the direct department tool, or keep using the + pen tool (they work the same for dragging points)
Grab the new point into position and now y'all take a nice bend. Don't worry if you are getting confused, check out this simple tutorial on the pen tool
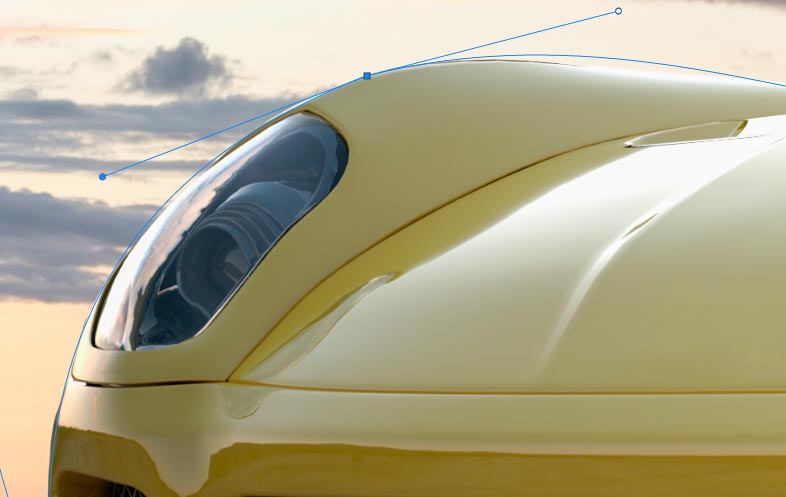
Cease refining the path using the techniques shown.
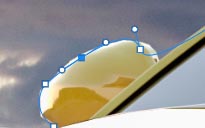
Step 4. Finishing off the path.
Once yous are washed, let's consider moving the exterior points to fully cover the heaven.
Drag the corner points until y'all have something like this. If you have gotten this far, congratulations!
Stride five. Making a choice from a path
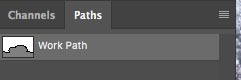
Go to the Paths panel
Yous will run into our path as "Work Path". You tin can save and apply this path as a clipping group in InDesign or Quark Xpress. (If yous are going to a layout application for print, this is the best option considering the path is a vector which sales and prints better than pixels.) For compositing piece of work in Photoshop, convert to a selection and mask as in the following steps.
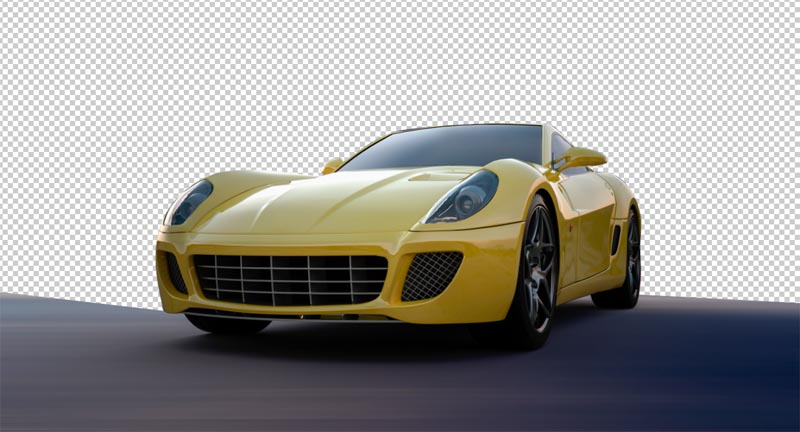
In this case, we are going to turn information technology into a pick. Hold downwardly Cmd/Ctrl and click on the work path in the Paths console.
Y'all will now see the marching ants section.

Agree down Alt/Pick to create an inverted mask.

And we now have a perfect cutout with the cleanest edges yous have seen.
Alright, I have just shown you iii methods for cut out unlike images in Photoshop. The is a large tutorial, and so brand sure you picket the video at the summit. I have likewise included more in-depth tutorials on the individual techniques in the links below. You may want to bookmark this page (and share with your friend). I think information technology will serve as a good "selection resources" landing folio for you.
Here is a brusk list of my other tutorials on cut out and extracting.
- ► Using the Pen tool in depth
- ► How to cut our transparent objects
- ► How to cut out trees in Photoshop
- ► How to extract impossible images
- ► How to cut out hair in Photoshop
Thanks for checking out this tutorial and explore PhotoshopCAFE, at that place is a lot of useful content on the site.
See y'all shortly,
Colin
Photoshop CC Option Secrets
New Class by Colin Smith
Stop struggling with selections. Learn how to select and cut out anything from people, hair, copse, complex shapes and even transparency.
Notice how to get perfect edges, without halos and jaggies. Colin shows y'all exactly how in 18 lessons.
All the images are included for you to follow along.
You will be able to select and cut out anything: faster and cleaner.
More than info here
Source: https://photoshopcafe.com/cut-anything-photoshop-3-best-ways-remove-backgrounds-photos/
Posted by: piketheirey.blogspot.com
0 Response to "How To Make Cutouts In Photoshop"
Post a Comment