

How To Make A Face Texture In Photoshop
Acquire How To Create Realistic Peel Texture Event In Photoshop
Acquire How To Create Realistic Skin Texture Event In Photoshop www.sleeklens.com
Hi all and welcome to my new Adobe Photoshop tutorial.
Today we're going to be fixing a problem that a lot of retouchers will come up across.
When y'all take to retouch pare a lot of times you will find that after all the blotch removal.
All the Gaussian blurring or whatever else has been washed to the portrait…
Yous will find that yous may have lost a proficient bit of the photoshop texture of the flesh.
Your image now looks overly airbrushed and plastic and not and then real anymore.
Well all is non lost…
Because you can create flesh texture no bother and add it back in.
Wanna know how let's find out! (If not yous can always use our Photoshop actions )
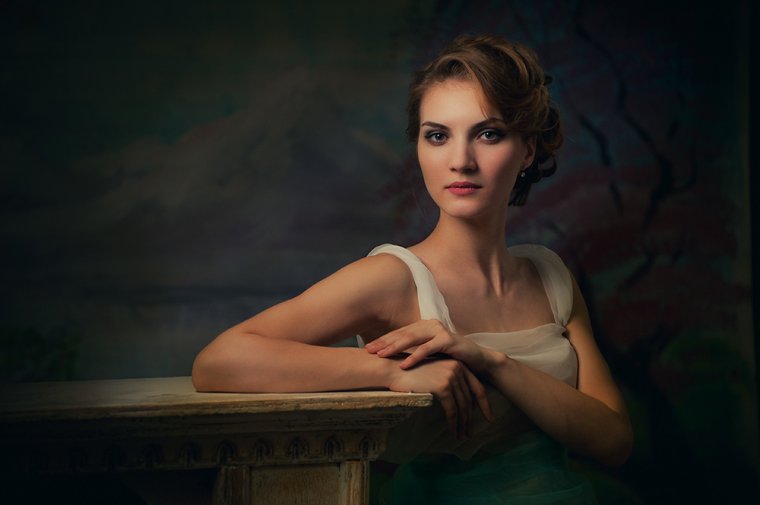
Ok so take hold of your self a portrait image that looks a little over airbrushed.
This shouldn't be too hard, they're literally all over the net.
Utilize your own likewise if you desire, in fact, I have a few of my quondam ones I can give y'all…
I have plenty of them haha.
If you don't have any images that are overly airbrushed and then piece of cake.
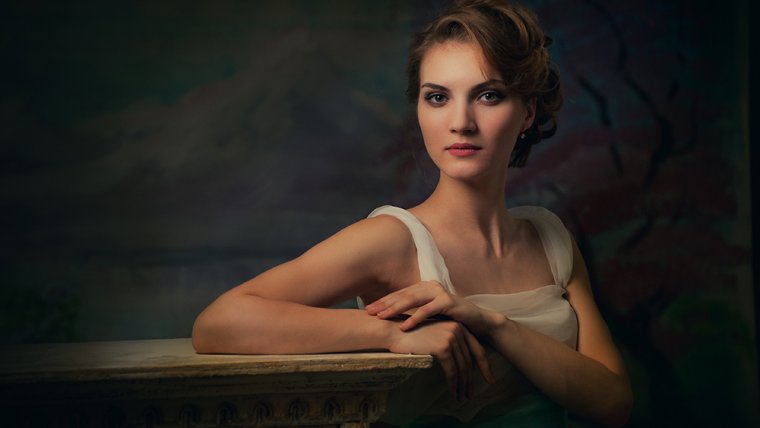
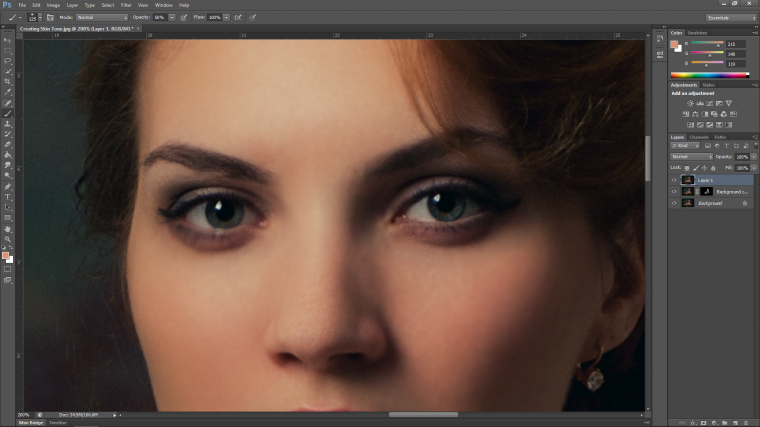
But find an epitome like this one below I'm going to use.

If you lot can't find an image to piece of work on.
Follow these simple steps to create an airbrushed type of disaster to work on.
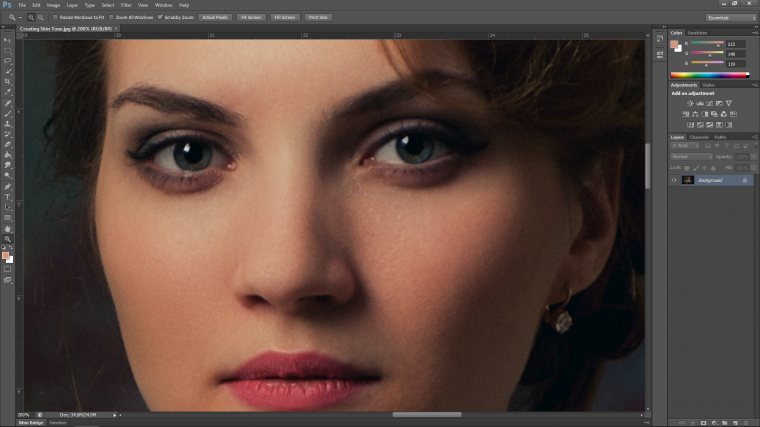
You lot can zoom in on the face by using the Ctrl + and – on your keyboard.
Property space bar and clicking and dragging will let yous move around your prototype.
Recollect these handy tips.
Get to Layer – Duplicate Layer to create a re-create of the first layer.
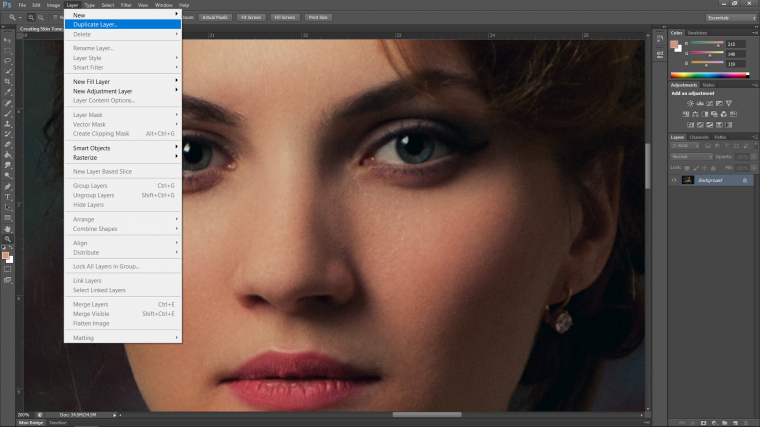
You will run into information technology appear on the right-hand side in the layers console.
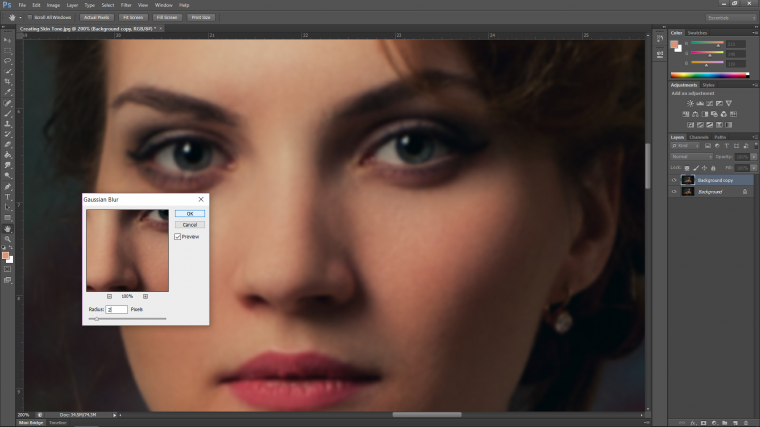
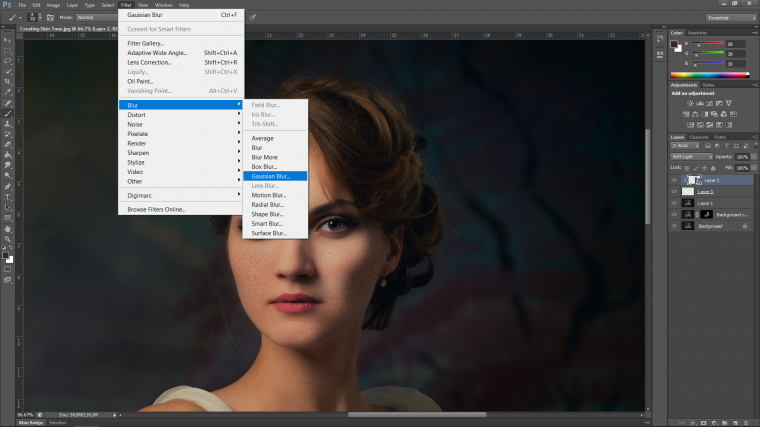
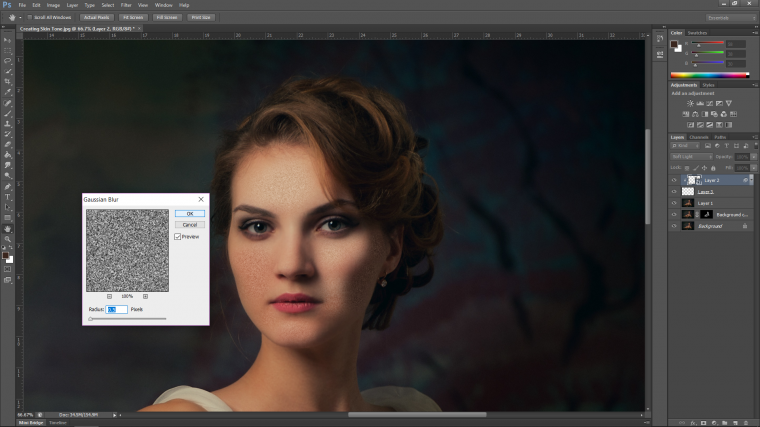
The next thing that you will want to do is to get up to Filter and so await for Mistiness.
In there you'll find good erstwhile Gaussian Mistiness, my best friend in the globe.
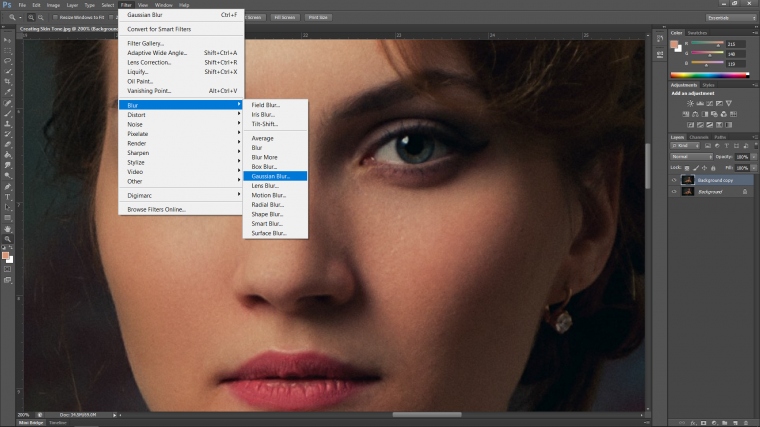
And so a side note before we add a number to the radius.
My image was pretty big and pretty detailed, it'south around 4000 broad.
Therefore the all-time number was 2.
If in your prototype 2 is likewise much try 0.5 and work upward until you become a blur.
Striking OK when you are washed.
Next, nosotros are going to create a mask over the new layer.
Go to Layer once more…
Expect for Layer Mask and choose 'Hide All'
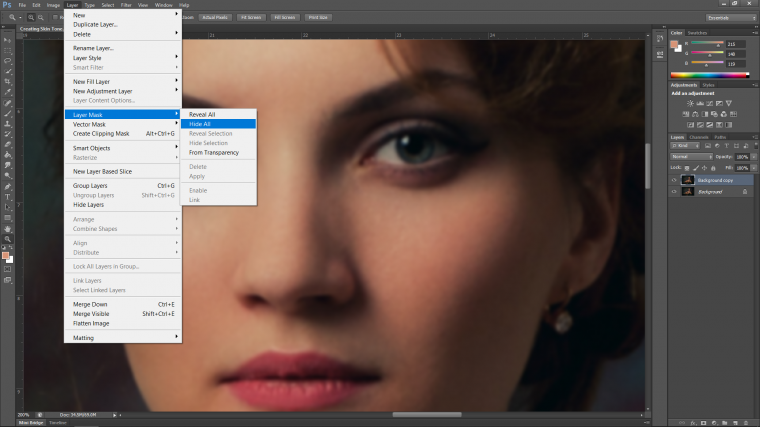
You'll see the thumbnail is now to the right-hand side of your layer.
To practise this make sure yous have clicked on the blackness box if it is not already selected.
Now wait to the top left-manus side.
Meet the menu under File and Edit etc?
Click on the second drop downward box and choose the first brush caput.
Then slightly to the correct, you'll see 'Opacity'
Change that to 50% so you'll get a nice blend from your castor.
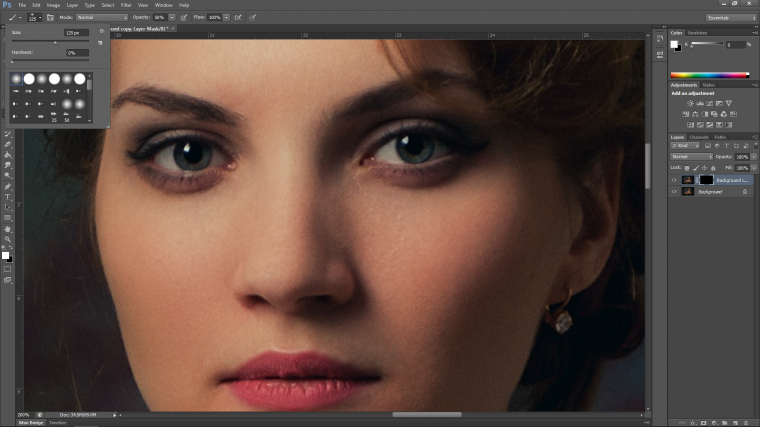
At present using White on your castor, you lot'll find the pick on the eye left.
There are 2 little overlapping boxes.
Double click on the white one.
Now all you have to practise is just paint over your image on the areas like the cheeks, mentum, and forehead, etc.
But get out the lips and eye.
For this tutorial, we'll only work with the face and so you don't have to practice the total image.
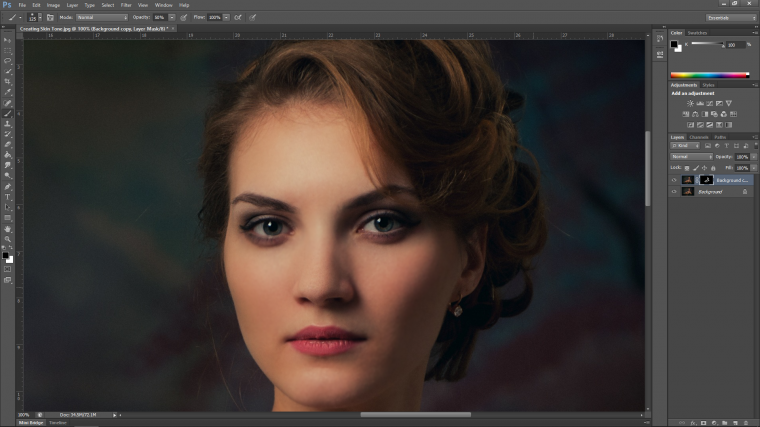
Ok at present let's create a stamp.
A stamp is a layer combining all your other layers.
On your keyboard, agree… (Ctrl – Shift – Alt and and so hitting E)
You'll now see your new layer.
With that out of the fashion, we are fix to become to the meat of the tutorial.
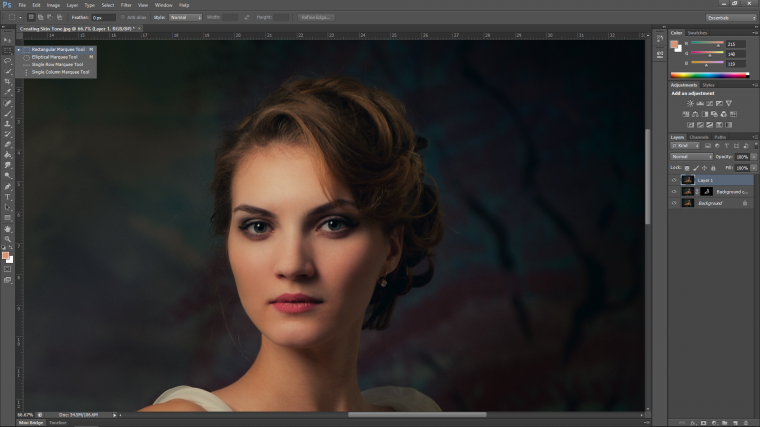
Allow's now create a selection over the confront.
Take hold of your Rectangular Marquee Tool and click and drag information technology over the face.
You tin can use the keyboard shortcut (M).

Then create a new layer that should be at the elevation of the layer stacking order.
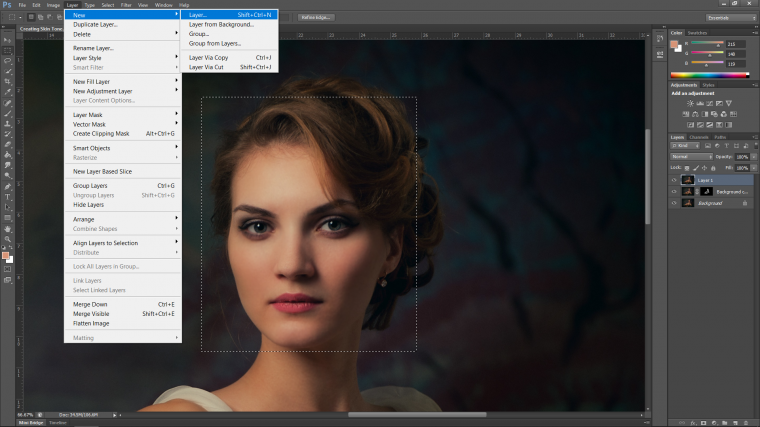
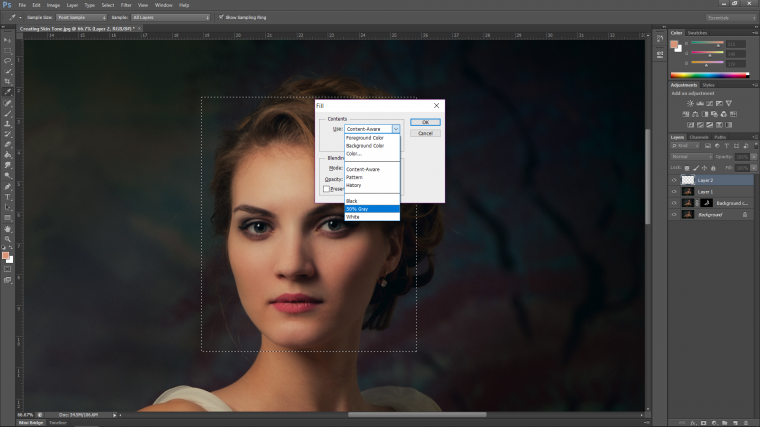
Now hit Shift + Delete on your keyboard to open up upward the make full options.
You want to hit the delete just above the render bottom.
Not the one at the very tiptop as that ane does another function and volition not piece of work.
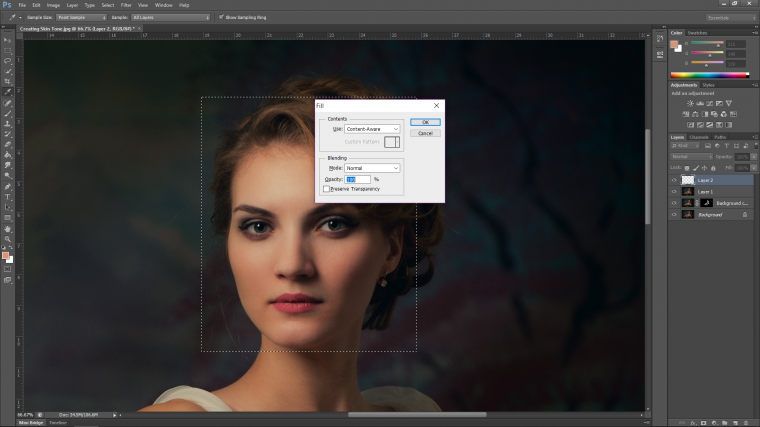
Click on the drib-downward box the is labeled 'Apply'
Choose 50% Gray and click OK.
Your option will now wait like my example epitome below.
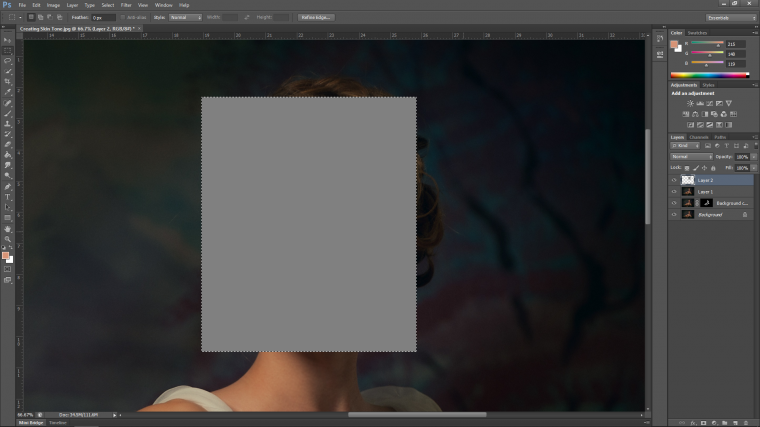
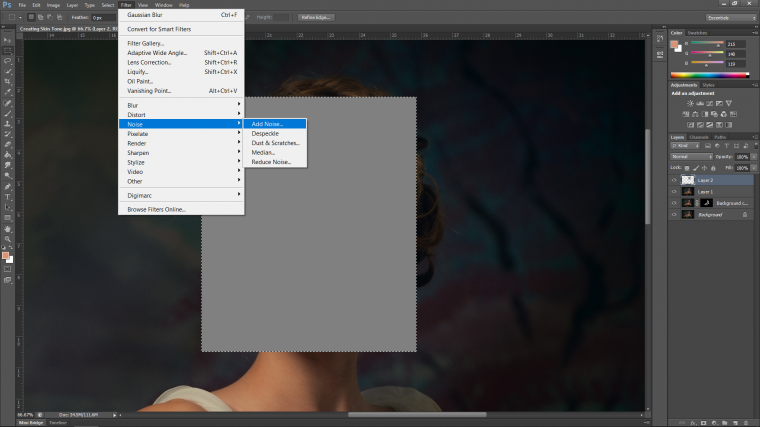
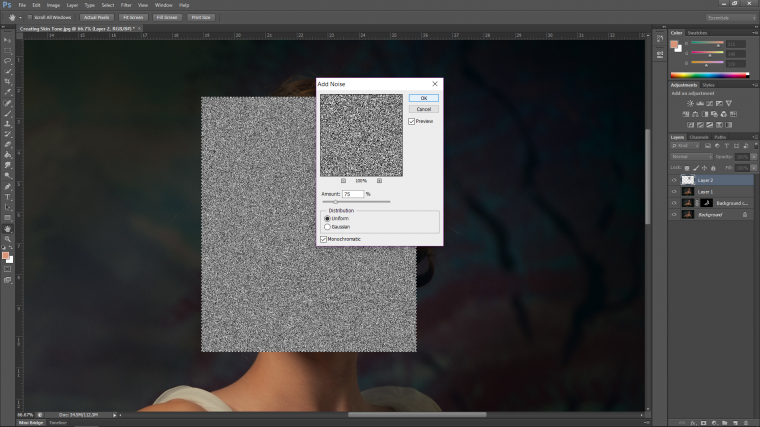
The adjacent step will exist to add Dissonance to the Gray square.
Y'all will find that in Filter – Racket – Add Noise.
A pop up will appear with the word 'Amount' roughly in the middle and a slider under information technology.
Don't bother with that, instead, just blazon into the Amount box anywhere from l-75%.
Get it similar to mind and y'all will exist golden.

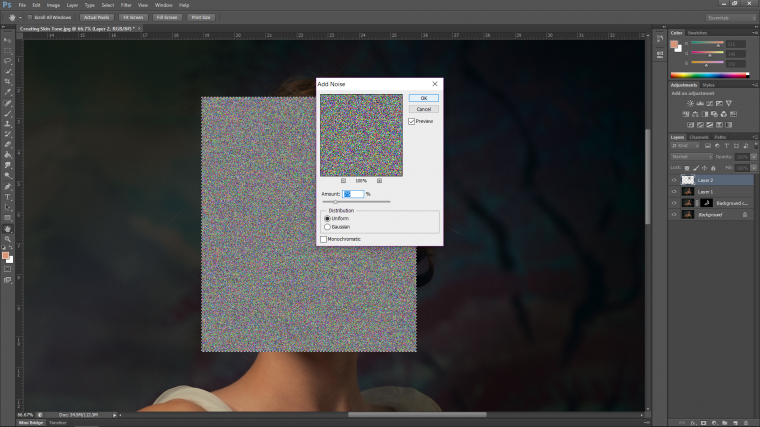
You'll notice that the racket has a lot of colors mixed through it.
Well, what you'll want to do here is to bank check the 'Monochromatic' box at the bottom.
Then click Ok when you are happy and nosotros'll motion forward.
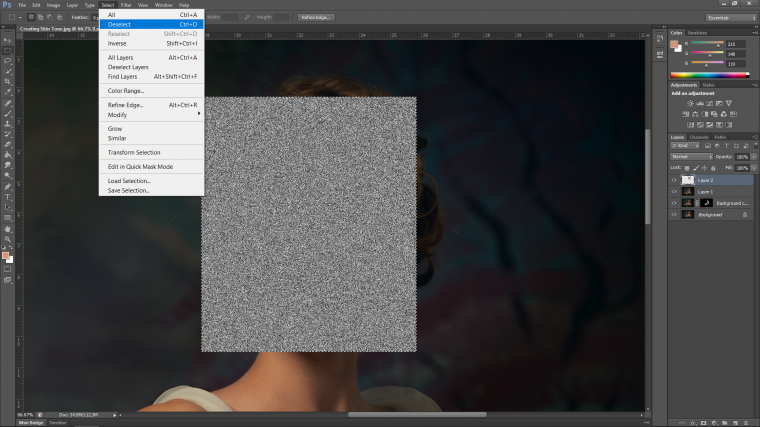
You can now Deselected the foursquare (Keyboard shortcut Ctrl D)
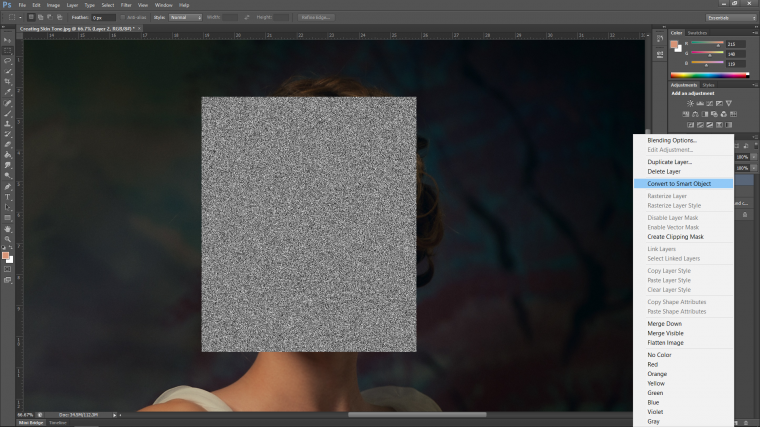
When you have that washed then go over to the layer on the right-hand side.
Correct-click on it with your mouse.
In the pop up that appears on your screen look for 'Convert to Smart Object'
Click that and your layer volition now be able to be edited without it losing any ofitss particular or resolution.
We will now ad a Blend Fashion to the layer.
Cast your eyes to the correct hand side where the layers panel is.
Wait for the word 'Normal' (if it'due south a different word and so you probably know about Alloy Modes)
You desire to click on the drop box.
If y'all are withal stuck look for 'Opacity'
It'due south just to the left of that, correct abreast information technology.


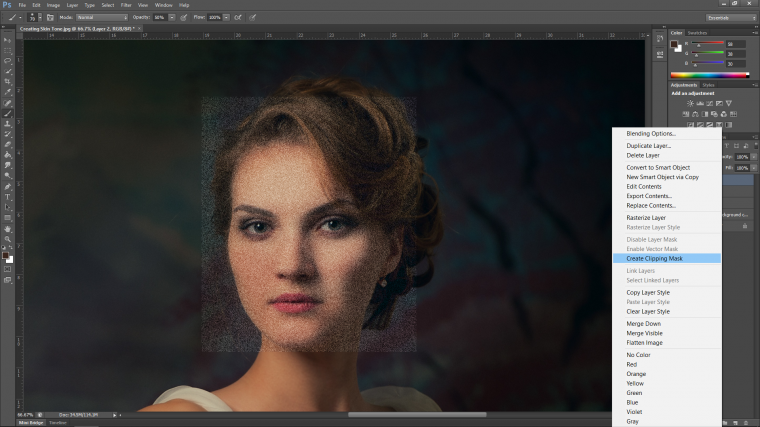
At present we are going to create what is known as a Clipping Mask.
Information technology will sound kinda complicated to outset of with but once you get the hang of it you'll see how straight forrad it actually is.
And so first click the heart onthe top layer which is the Noise Layer.
Side by side, create a new layer (Layer – New – Layer…) and click and drag it so it is under the smart object layer.

And then take hold of your brush again brand certain it's on the soft castor option and the opacity is set to 50%.
Now we are going to paint over the areas that are "over airbrushed"
Hold Alt and sample the color of the surface area and and so go on to paint over them.
You will accept to keep sampling as you keep to friction match the colors.
If you brand a mistake Ctrl Alt + Z will let yous go dorsum steps.
Also, keep in mind the opacity of the brush, yous may have to drop it a lot lower to get a meliorate blend if it's too harsh.
Next, we will create our clipping mask.
Click the eye icon once again to reveal the superlative layer.
Then right click on it and find the choice 'Create Clipping Mask'
When you do that you will meet that the dissonance is at present within the painted area.
Accept not on this as you may employ it for another project.
Consider the dissonance is now within the painted area ok…
So if you were to move the noise effectually it volition still be in the painted area.
Hit Ctrl T and move the noise around to you run into what happens.
Merely wanted to throw that out there as an extra fiddling bit of knowledge.

At present we are going to soften down the racket a trivial and then what I'm going to do is add a piffling bit of Gaussian Blur to the layer.
If yous remember the size of my image (4000 pixels across) then you can judge the amount to use.
But I'd imagine anywhere from 0.v to 0.75 volition do the trick perfectly fine.
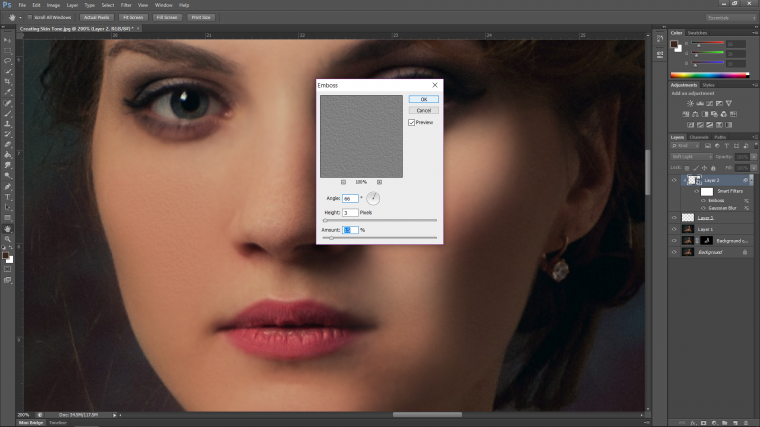
Now to add the texture.
So what we use to add the texture is a little matter called Emboss.
You can find it in Filter.
When you open filter wait downwards towards the bottom and you lot'll see Stylize and Emboss.
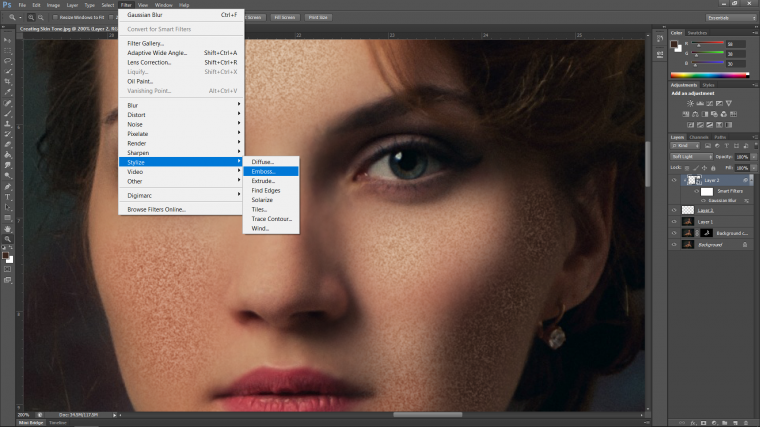
At that place volition be no standard setting here, the only thing that yous tin can do it to play effectually.
Make sure that 'Preview' is checked and y'all volition be able to see what the effect does in real fourth dimension on your actual image.
When information technology looks real and so become with that.
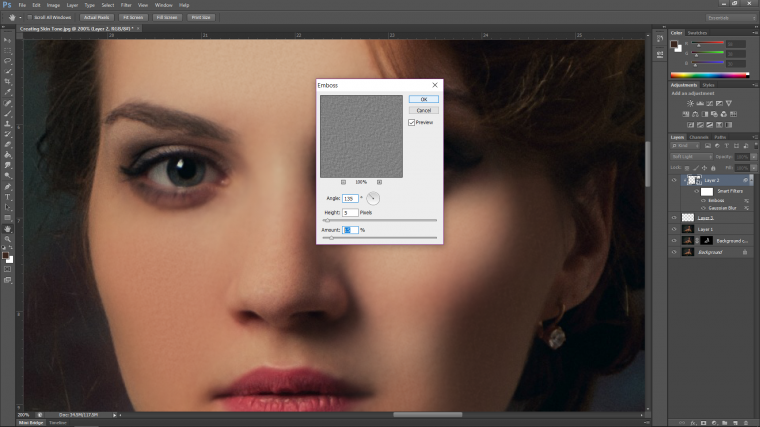
If on 2d look you remember you could practice better, re-open.
You tin re-open up at any phase.
You do this past double clicking on 'Emboss' under your layer in the layers panel on the correct.
That's under the Smart Filters White Box Thumbnail.
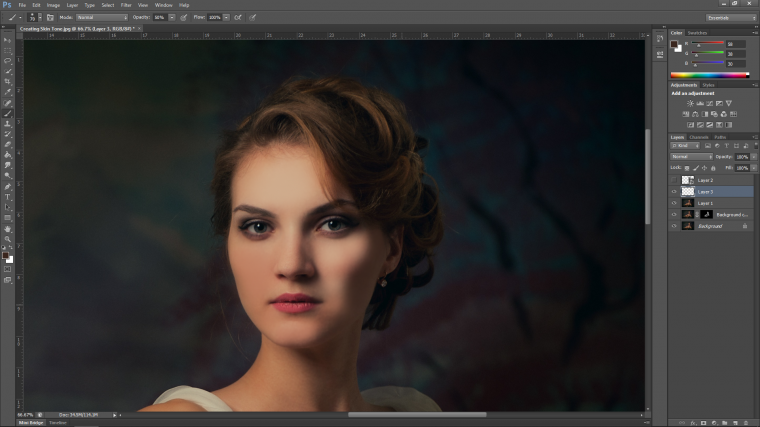
And that's it, hope you put this technique to good apply 🙂
Side by side, Acquire how to create a photo collage in Photoshop
The post-obit 2 tabs alter content below.
- Bio
- Latest Posts
Graduated from college in 2002 with a degree in Art & Design, I started exploring my manner in Graphic Pattern and Professional Mail Production. Full-time freelancer since 2011.
Source: https://sleeklens.com/blog/photoshop-tutorials/skin-texture-photoshop/
Posted by: piketheirey.blogspot.com
0 Response to "How To Make A Face Texture In Photoshop"
Post a Comment